In previous blog, we have converting the PDF documents into the FAISS vector index, and saved in the local. Now, we will build a RAG chatbot using the LangChain, Chainlit and OpenAI base on previous FAISS index.
Before we get started, let’s talk about what is Chainlit and LangChain.
Chainlit
We choose the Chainlit framework to build the chatbot. Chainlit is a framework designed to simplify the process of building and deploying chatbots for large language models (LLMs). It provides a way to create conversational applications that can interact with users through chat interfaces. Chainlit helps developers to chain together different components of a chatbot, such as the model itself, user interfaces, and data sources, making it easier to build complex conversational systems. It is particularly useful for those who want to integrate LLMs into their existing applications or create standalone chatbots. You can find the Chainlit documentation here.
LangChain
LangChain is a framework designed to simplify the process of building language models and applications that leverage these models. It provides a set of tools and libraries that allow developers to integrate language models into their applications more easily, handle data flow, and manage the interactions between different components of their system. LangChain supports various language models and can be used to create a wide range of applications, from chatbots and virtual assistants to document summarization and translation tools. It aims to make it straightforward to build, deploy, and scale language-driven applications.
Get started
Ok, let’s get started. First, we need to install the LangChain and Chainlit and other libraries, all the required libraries are below. Creating a requirements.txt file and store below libraries in it:
1 | openai |
I suggest to create a virtual environment for this project before installing these libraries. We can use the following command to create a virtual environment:
1 | python -m venv venv |
After creating the virtual environment, activate it using the following command:
1 | source venv/bin/activate |
Then install all the required libraries using the following command:
1 | pip install -r requirements.txt |
Now, we can start building the chatbot.
Building Chatbot UI
The Chainlit provides the wonderful API to build the chatbot UI. It saves much time and efforts. In the project, create a app.py and import the chainlit library then write the below code. We will use 3 chainlit annotations. @cl.set_starters, @cl.on_chat_start, and @cl.on_message.
1 | import chainlit as cl |
The
@cl.set_startersannotation is used to set the chatbot starter page. It takes a list ofcl.Starterobjects as input. Eachcl.Starterobject represents a question and its corresponding message. Theiconparameter is used to set the icon for the question.The
@cl.on_chat_startannotation is used to start the chatbot logic. Such as setting the initial state of the chatbot, loading the chatbot model, FAISS index, create a langchain pipeline, etc.The
@cl.on_messageannotation is used to handle the chatbot logic and response. It takes acl.Messageobject as input. Thecl.Messageobject contains the user’s message and other metadata. We can use themessage.contentattribute to get the user’s message.
The starter page screenshot like below:
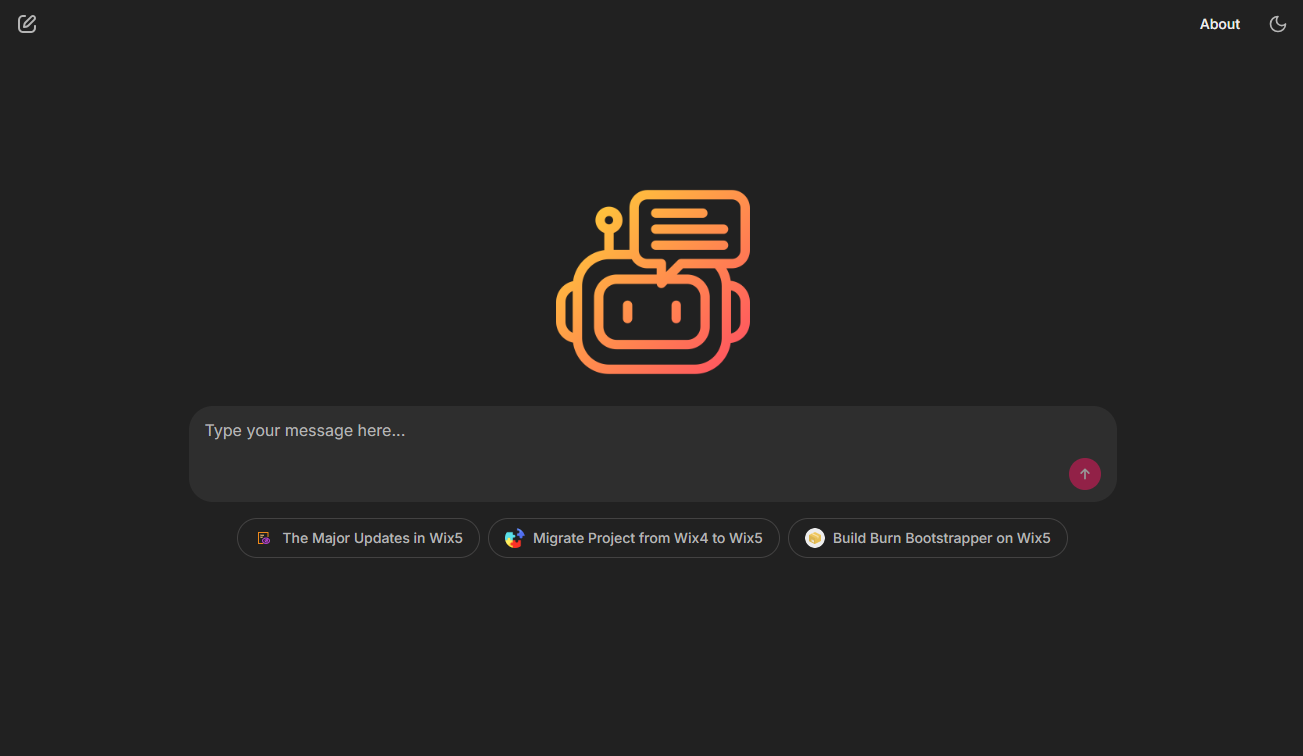
You can also customize the theme, or do some changes in UI.
Loading the FAISS Vector Index
Using FAISS library, we can load the FAISS vector index. We need to pass the embeddings and index_name to the FAISS.load_local method. The embeddings parameter is the embedding model we used before, and the index_name parameter is the name of the index. Here, our embedding model is AzureOpenAIEmbeddings and the index name is wix-upgrade.
1 | load_dotenv() |
Using load_dotenv() method, we can load the environment variables from the .env file. We can put the loading vector index code in the @cl.on_chat_start annotation.
Building the Converstaion Chain
After we load the vector index, we can build the conversation chain using LangChain. The main logic are below.
1 | from langchain_openai import AzureOpenAIEmbeddings,AzureChatOpenAI |
In above code, we first load the FAISS vector index and create the AzureChatOpenAI language model. We then create the retriever using the docs_vector_store and create the history_aware_retriever using the create_history_aware_retriever method. The contextualize_q_prompt method is used to create the contextualized question prompt. The create_stuff_documents_chain method is used to create the question answer chain. Finally, we create the rag_chain using the create_retrieval_chain method.
We then create the conversational_rag_chain using the RunnableWithMessageHistory class. The get_session_history method is used to get the chat history for each session. The input_messages_key, history_messages_key, and output_messages_key parameters are used to set the keys for the input, history, and output messages.
We set the conversational_rag_chain as the chatbot chain using the cl.user_session.set method. We can use it later.
Here you’re notice there is contextualize_q_prompt and QA_PROMPT variable. They are prompts which will passting to LLM to restrict the LLM answers. The code is below:
1 | from langchain_core.prompts.chat import ( |
The contextualize_q_prompt is used to create the contextualized question prompt base on chat history and the latest user iput. The MessagesPlaceholder("chat_history") is used to insert the chat history in the prompt. From the prompt, It will formulate a standard question base on chat history and the latest user input.
The qa_system_prompt is used to create the question answer prompt. It is limit to only answer the related questions about WiX development. If the user’s question is not related to WiX development, it will say I don’t have such information, please refer to the WiX offical documentation for the information. You can also remove this limitation prompt text to make the AI model reply any question.
So now, our chain is ready to use. Next step we will uset this chain to answer the user’s question.
Invoke Chain
In previous step, we have set the conversational_rag_chain as the chatbot chain using the cl.user_session.set method. Now, we can use it to answer the user’s question. Below is @cl.on_message annotation to invoke the chain and send the response.
1 |
|
In above code, we get the conversational_rag_chain from the cl.user_session and invoke it with the user’s message. We set the session_id in the config parameter to get the chat history for each session. We then send the response to the user in chunks of 20 characters.
The following code is simulating the stream response in the UI.
1 | stream_size = 20 |
The AzureOpenAI has content limitation, the user input which pass to the OpenAI API will be filtered if it contains any offensive or inappropriate content. So, we need to handle this situation. We can use the ErrorMessage class to send the error message to the user if the response is filtered.
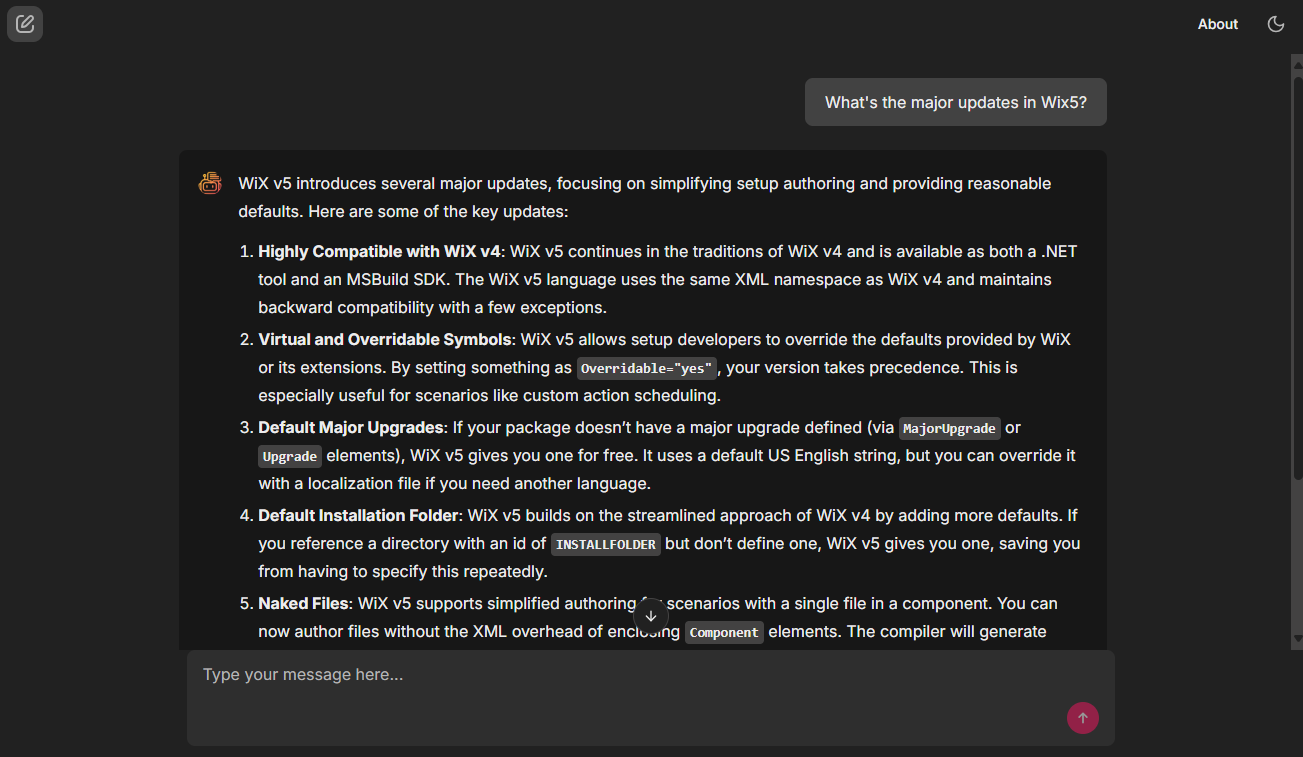
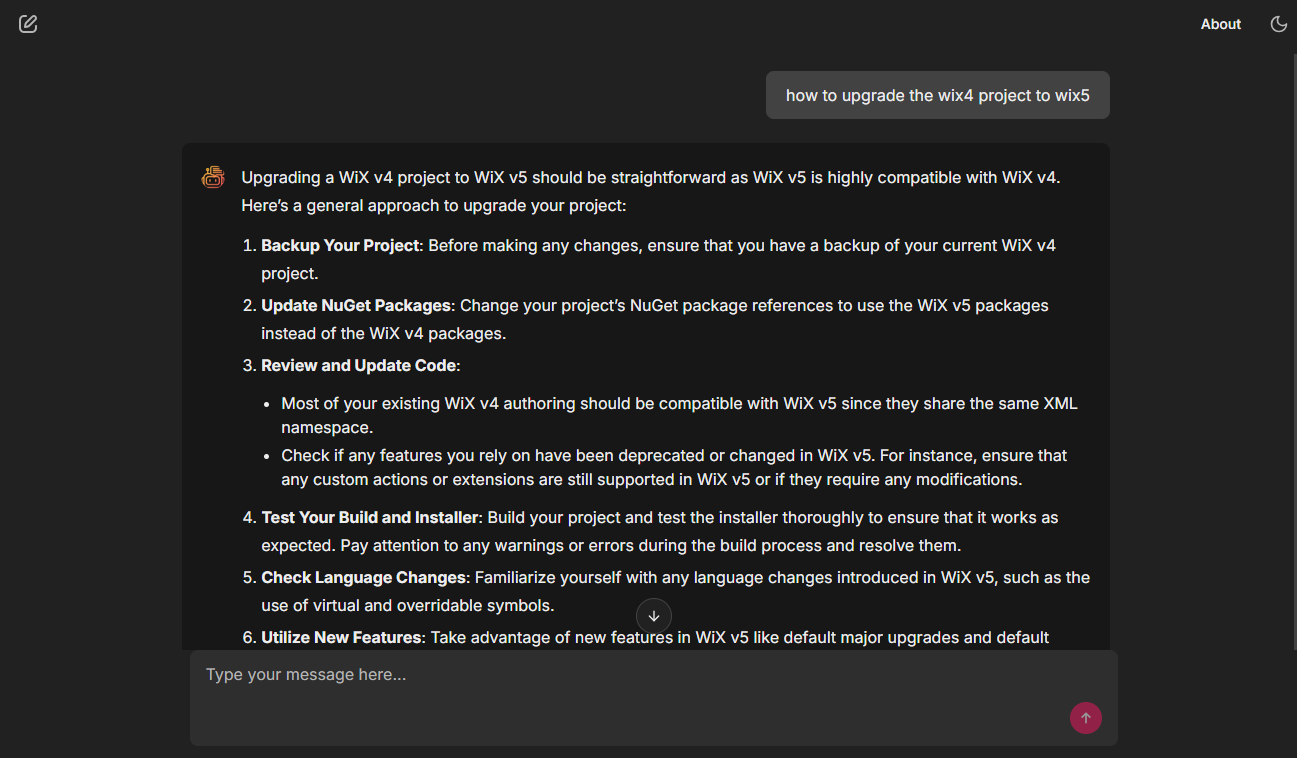
Chat Demo Screenshoots
Below are screenshots of the chatbot conversation UI and response.

Conclusion
In this blog, we have built a RAG chatbot using the LangChain, Chainlit and OpenAI base on previous FAISS index. We have used the Chainlit to build the chatbot UI, and the LangChain to build the conversation chain. We have also used the FAISS library to load the FAISS vector index and the AzureChatOpenAI language model. Finally, we have used the RunnableWithMessageHistory class to handle the chat history and the ErrorMessage class to handle the content filter.
If you want to get the full code, you can find it in the GitHub repository. In this demo, we just put the 4 PDF documents which upgrade Wix3, Wix4 to Wix5. You can replace it with your own documents.