Python’s ecosystem thrives on its rich library of packages, but managing dependencies can sometimes feel sluggish, especially in large projects. Enter UV, a modern package manager and resolver designed to supercharge your workflow. Developed by Astral (the team behind the popular Ruff linter), UV promises blazing speed and seamless integration with existing Python tools. Let’s explore why UV might become your new go-to for dependency management.
What is UV?
UV is a Rust-powered tool that combines a package installer (pip) and virtual environment manager (venv) into one ultra-fast solution. It aims to replace traditional tools like pip, pipenv, and poetry while staying fully compatible with their workflows. By leveraging Rust’s performance advantages, UV dramatically reduces installation and resolution times—often by 10-100x compared to older tools.
Why Use UV?
Speed: UV resolves and installs dependencies in seconds, even for complex projects.
Simplicity: It’s a drop-in replacement for pip and venv, requiring no workflow changes.
Modern Features: Supports pyproject.toml, lock files, and advanced dependency resolution.
Cross-Platform: Works on Windows, macOS, and Linux.
Getting Started with UV
Installation
UV is distributed as a static binary, so installation is straightforward:
Install via pip (recommended)
1 | pip install uv |
Or use curl (Mac/Linux only)
1 | curl -LsSf https://astral.sh/uv/install.sh | sh |
Once the installation is complete, you can verify the installation by running:
1 | uv --version |

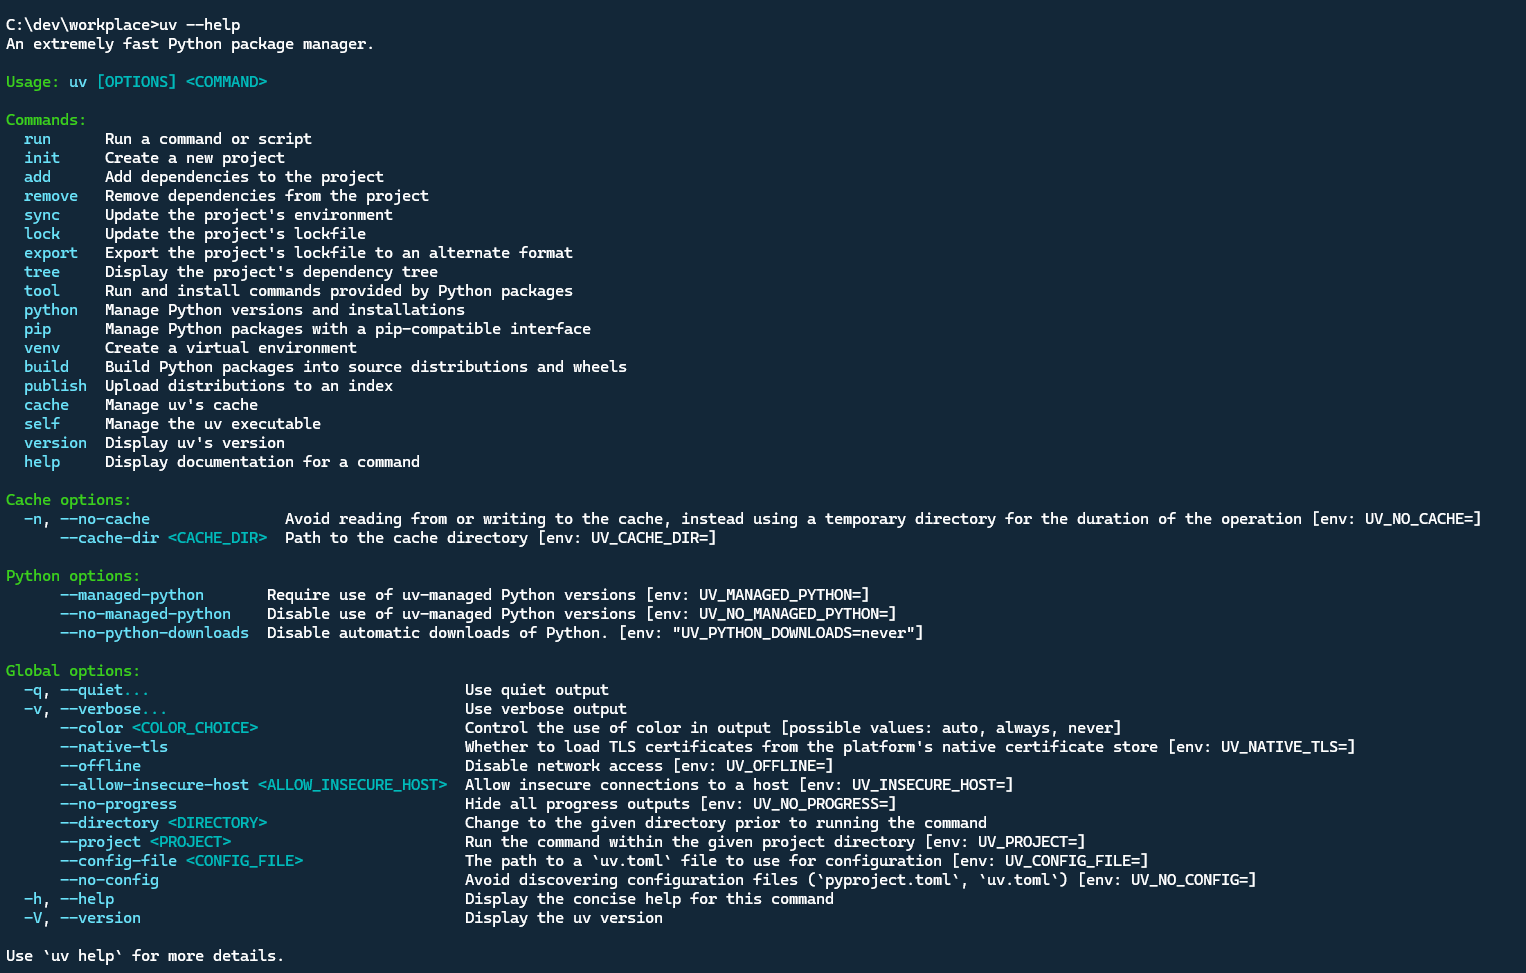
Running below command to get the help message:
1 | uv --help |
Creating a Project
To create a new project with UV, run:
1 | uv init <project-name> |
This will create a new project called pyproject.toml file and a uv.lock file. The pyproject.toml file is where you can specify your project’s dependencies and other metadata. The uv.lock file is where UV stores the resolved dependencies and their versions.
Let’s create a new project called uv-sample:
1 | uv init uv-sample |

It also creates associated with the git for this project, .python-version file for managing Python version, and a sample main.py python file.
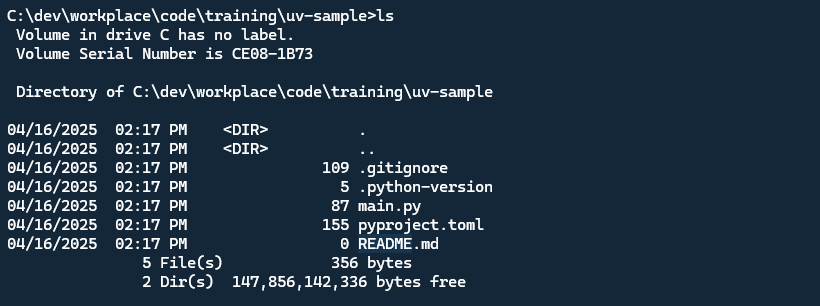
The pyproject.toml file is where you can specify your project’s dependencies and other metadata. Since this project doesn’t have any dependencies, so the uv.lock file is empty. Below is uv-sample pyproject.toml file:
1 | [project] |
Manage Dependencies
Using uv to manage dependencies is as simple as adding them to the dependencies section of the pyproject.toml file. For example, to add pandas as a dependency, we can run:
1 | uv add pandas |
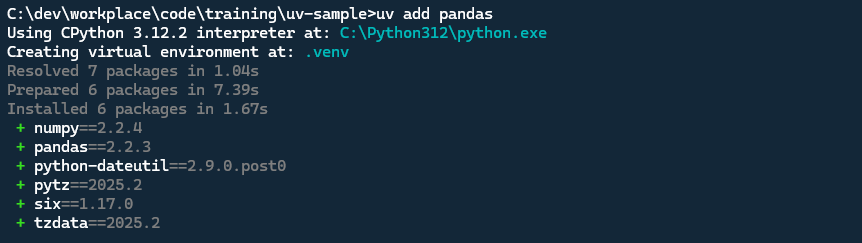
From the screenshot, you can see before adding the dependency in python project. The uv also help us to create a virtual environment for our project. The package and dependencies installed in the virtual environment will be isolated from the system-wide packages.
The uv.lock file will be updated with the installed dependencies and their versions. And the pyproject.toml file will be updated with the new dependency.
pyproject.toml file after adding pandas as a dependency:
1 | [project] |
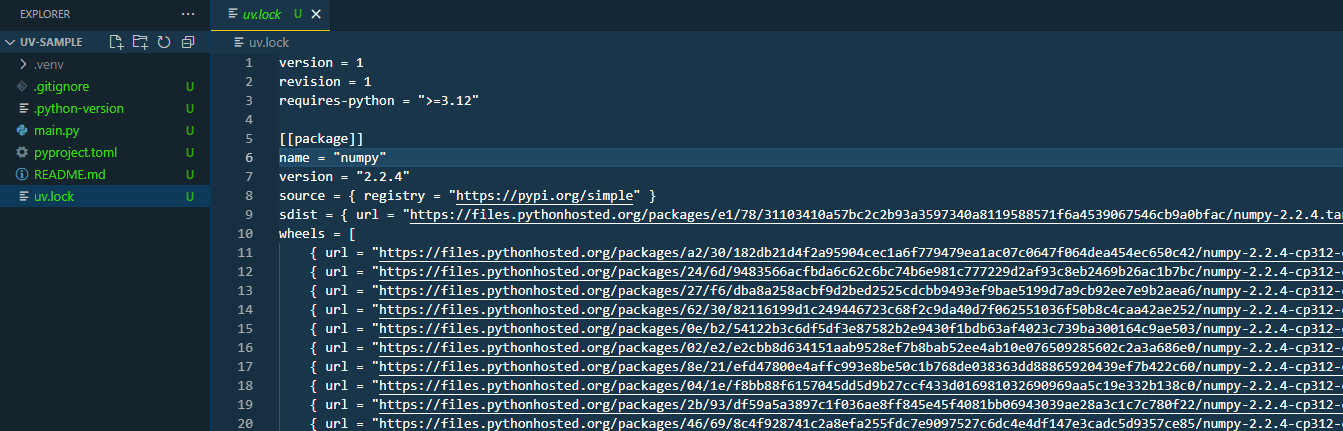
uv.lock file is like a package-lock.json file for npm or yarn. It contains the resolved dependencies and their versions. We can see the installed dependencies and their versions in the uv.lock file. Please don’t edit this file manually.
To see the dependencies tree, we can run uv tree command.
1 | uv tree |
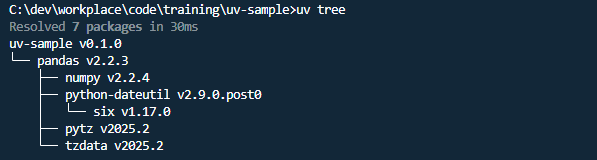
It lists all the dependencies and their dependencies recursively.
You can also remove the dependency by running: uv remove <dependency-name>
1 | uv remove pandas |
If your project is cloned. And you want to setup the development environment on your local. You can run uv sync to install the dependencies from the uv.lock file.
1 | uv sync |
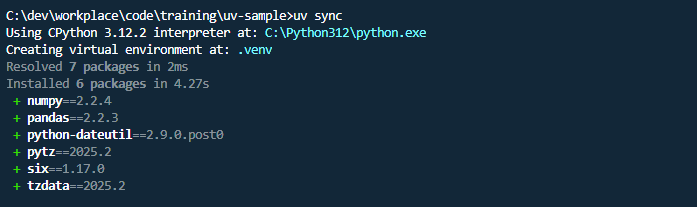
See, it’s very easy. It created a virtual environment for our project and installed the dependencies from the uv.lock file.
The uv has more features like using uv to install and select specific python verison, run the python code.
Manage Python Version
Using the uv also can manage the python version for your project. Below is the snapshot to manage the python.
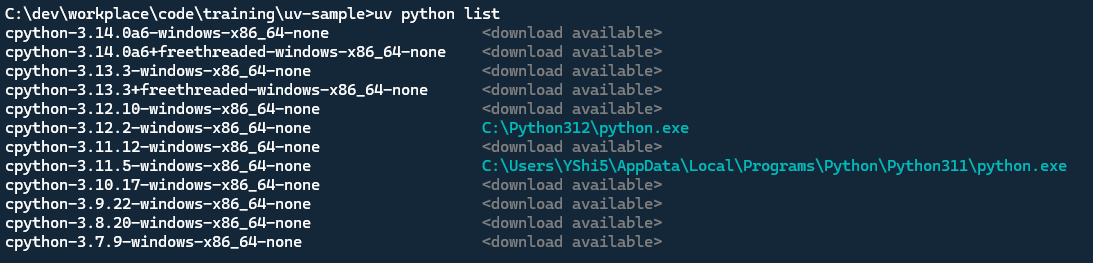
List all the available downloaded python.
1 | uv python list |
You can download and install the specific python version.
1 | uv python install <version> |
Let’s install the python version 3.14. See below screenshot.
1 | uv python install 3.14 |

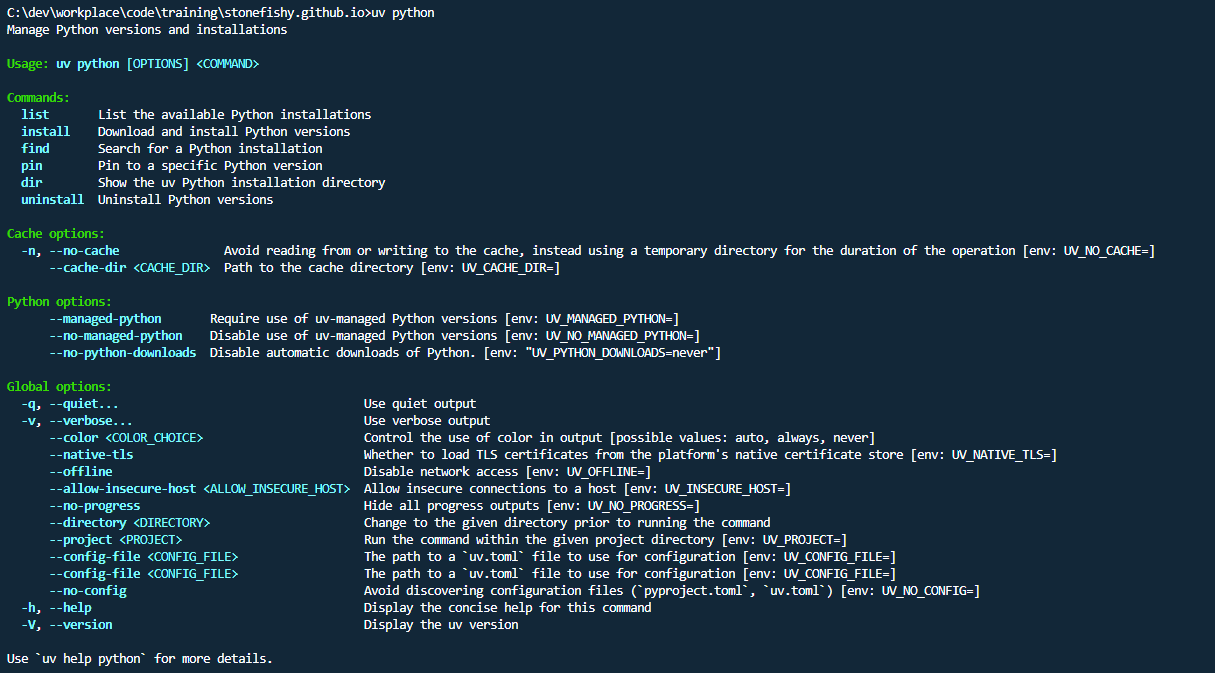
So using uv we can manage multiple python versions at same time. It’s like nvm for node.js. For more using uv to manage the python version, you can type uv python --help to get the help message.
Run Python Code
Before uv, we running the python code usuallly by using python <python-file>. In uv, we can run the python code using uv run command.
main.py example file.
1 | def main(): |
Executing below command to run the python code.
1 | uv run main.py |

Summary
UV is a modern package manager and resolver designed to supercharge your workflow. It promises blazing speed and seamless integration with existing Python tools. It’s a drop-in replacement for pip and venv, requiring no workflow changes. It works on Windows, macOS, and Linux.

