The GitHub Copilot is a tool that can help you write code faster and more efficiently. It can suggest code completions based on your code context and can help you write better code. But it is also can be used in the command line interface (CLI) like bash, zsh, PowerShell as well.
For example, we may want to use some command to execute the task in the CLI. For example, we may want to copy a file from windows to the linux machine. But we don’t know which command to use and how to use it? Usually, we may take some time to search for the right command and then execute it.
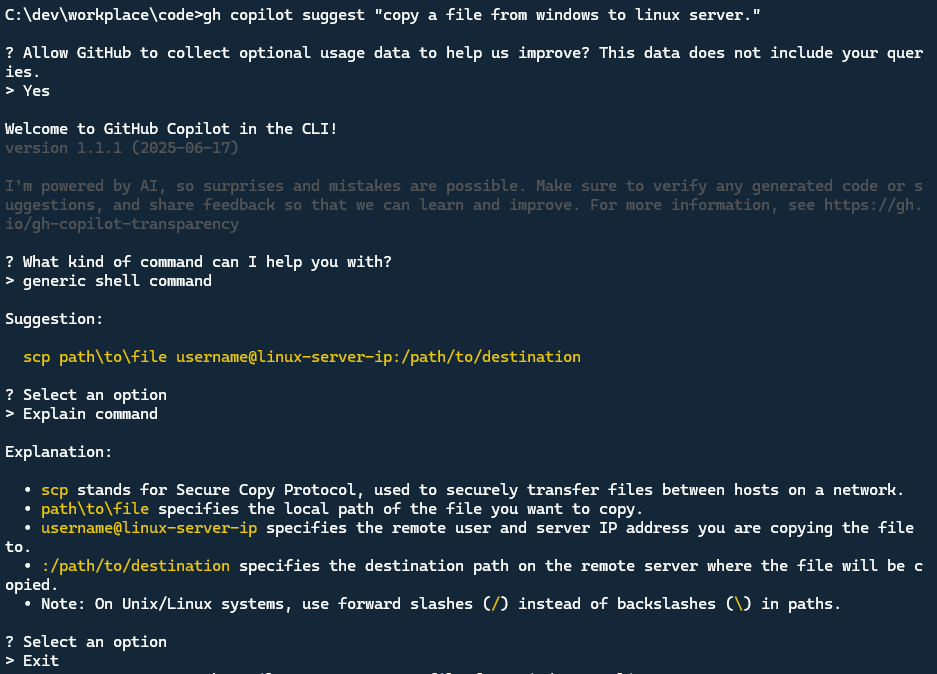
With GitHub Copilot, we can get the command for the task we want to execute in the CLI. We just need to type the task and GitHub Copilot will suggest the command for us. For example, if we want to copy a file from windows to the linux machine, we can type copy file from windows to linux and GitHub Copilot will suggest the command scp file.txt username@linux-machine:/path/to/destination.
Install GitHub CLI
To use GitHub Copilot in the CLI, firstly, we need to install the GitHub CLI. You can install it from the official website: https://cli.github.com/. Once we have installed it, we can start using it in the CLI. My local computer is windows, so I need to install the GitHub CLI for windows. You can find the installation instructions for different operating systems on the official website.
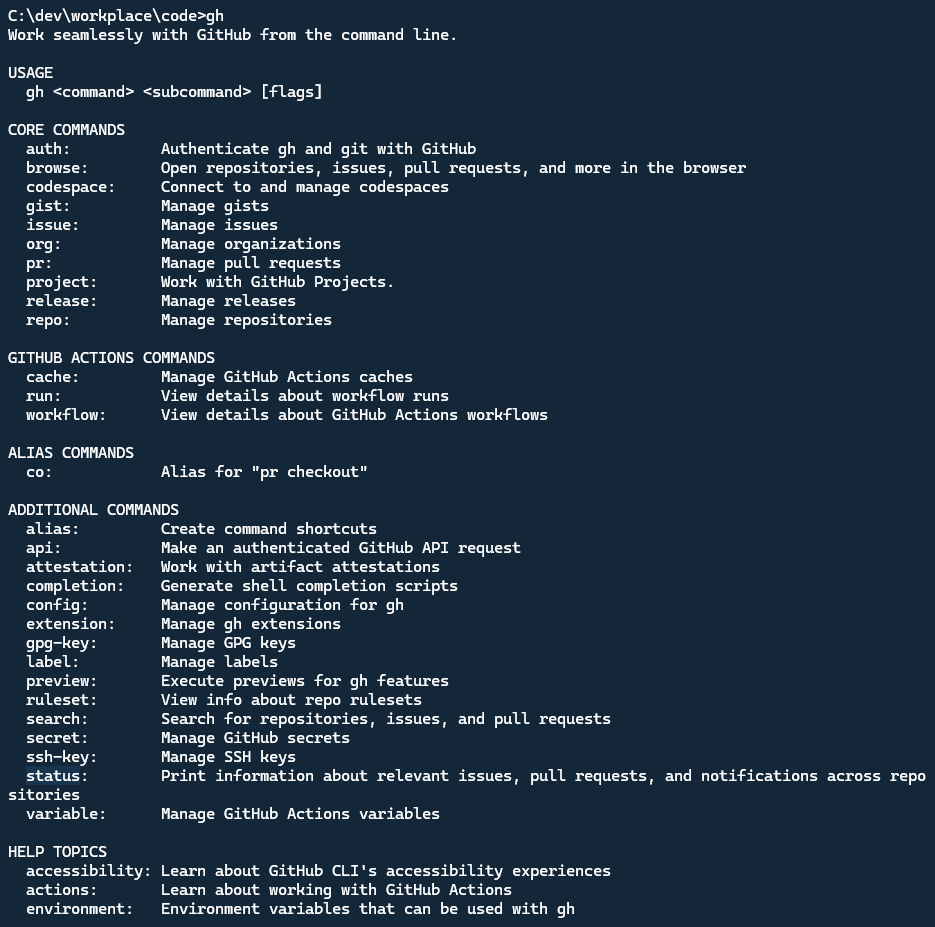
After you install it, you can type gh command to see the help information.
Install GitHub Copilot extension in CLI
To use GitHub Copilot in the CLI, we need to install the GitHub Copilot extension in the CLI. Before that, you need subscribe to the GitHub Copilot first. Go to the website: https://github.com/features/copilot/plans to check the plans, you can choose the individual plan or business plan. For the individual plan, you can get the GitHub Copilot for free with some limits.
Once you have subscribed, you can type below command to login GitHub from the command line:
1 | gh auth login |
Follow the command instructions to login with your GitHub account. You can choose the HTTPS protocol or SSH to login.

After you login successfully, you can install the GitHub Copilot extension in the CLI by running the following command:
1 | gh extension install github/gh-copilot |

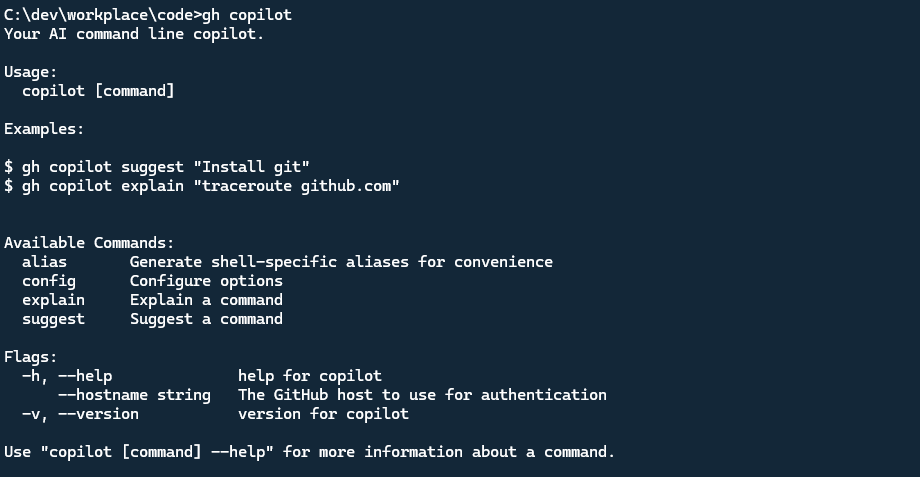
Typing gh copilot in the CLI, you can see the help information for the GitHub Copilot extension.
Use GitHub Copilot in the CLI
To use GitHub Copilot in the CLI, we can use gh copilot suggest <task> command. The task is the task we want to execute in the CLI.
For example, if we want to copy a file from windows to the linux machine, we can type gh copilot suggest "copy file from windows to linux". GitHub Copilot will suggest the command scp path\to\file username@linux-server-ip:/path/to/destination.
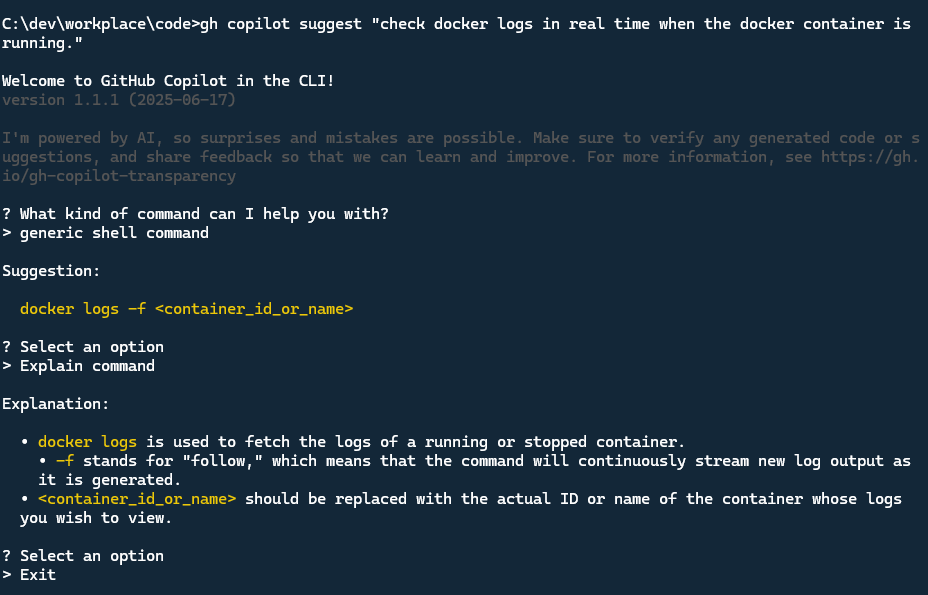
Let’s try another example, If we want to check the docker logs in real time when docker container is running, but we forgot the command, we can type below command:
1 | gh copilot suggest "check docker logs in real time when the docker container is running." |
See below result:
We can also ask the more complex command suggestion, here is example, Let’s create a directory named ‘gh-copilot-test’, create a new file named ‘test.txt’ under this directory and write the ‘Created by GitHub Copilot in CLI’ text in this file.
1 | gh copilot suggest "create a directory named 'gh-copilot-test', create a new file named 'test.txt' under this directory and write the 'Created by GitHub Copilot in CLI' text in this file." |
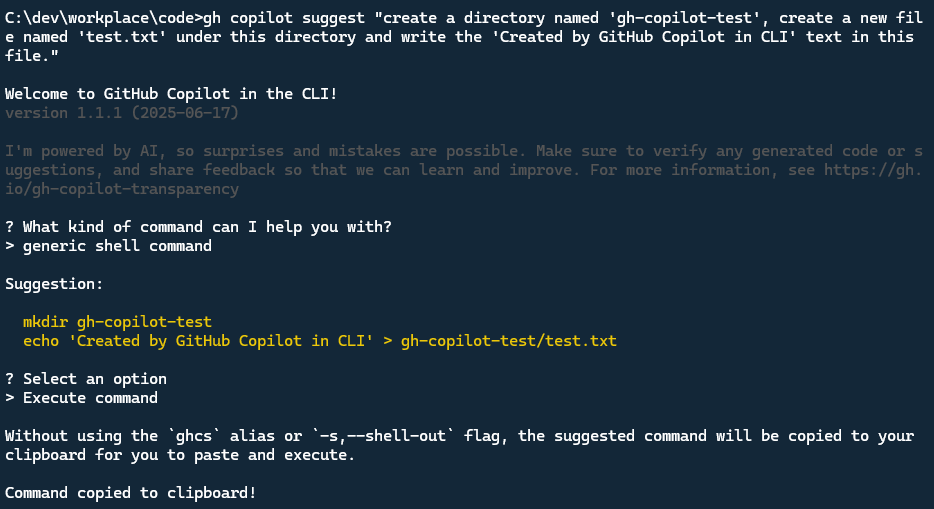
Because I’m using windows and not set the ghcs and ghce alias in my PowerShell, So choose the Execute Command not work, it copies the command to the Clipboard.
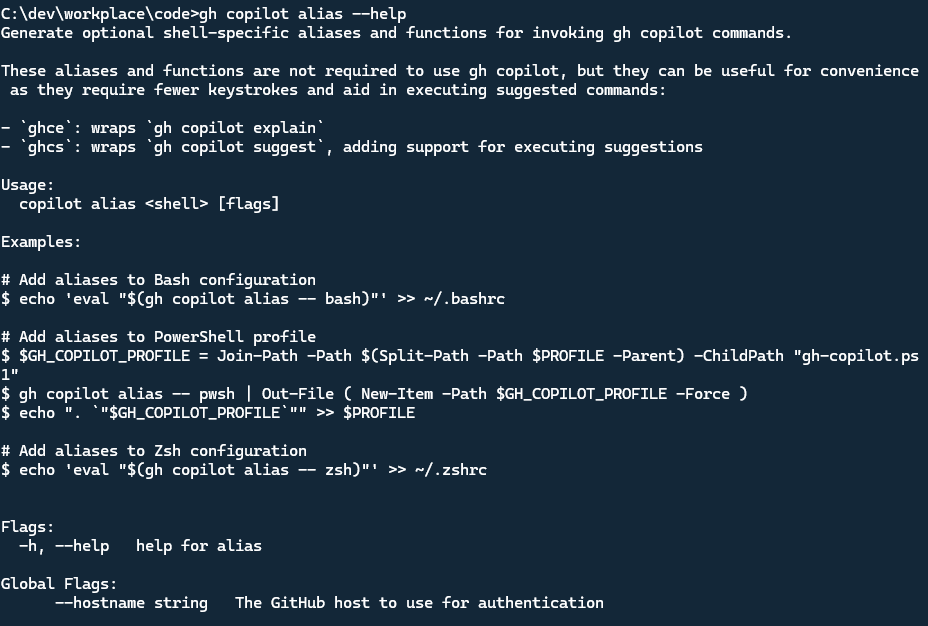
To see the Alias help, you can run below command:
1 | gh copilot alias --help |
The gh copilot alias command is used to set the ghcs and ghce alias in the CLI. As you can see below screenshot, it supports Bash, PowerShell and Zsh.
Note

