Have you ever dreamed of an AI assistant that can automatically create feature branches and implement code based on Jira ticket requirements? With the power of GitHub Copilot’s Custom Chat Modes, this dream becomes reality. In this blog, I’ll show you how I built a specialized AI agent called “onecloud-developer” that streamlines the entire development workflow from Jira ticket to code implementation.
Background
Modern software development often involves a repetitive workflow: reading Jira tickets, understanding requirements, creating feature branches, implementing code, and committing changes. This process, while necessary, can be time-consuming and prone to human error. With the advent of AI-powered development tools, we now have the opportunity to automate and streamline these workflows.
GitHub Copilot has evolved beyond simple code completion to offer sophisticated chat modes that can understand context, execute commands, and perform complex development tasks. By leveraging Custom Chat Modes, we can create specialized AI agents tailored to specific workflows and organizational needs.
The motivation behind creating the “onecloud-developer” agent was to eliminate the manual overhead of:
- Switching between Jira and VS Code repeatedly
- Creating properly named feature branches
- Translating business requirements into technical implementation
- Managing git operations and code commits
- Ensuring consistent development practices across the team
Understanding GitHub Copilot Custom Chat Modes
GitHub Copilot’s Custom Chat Modes represent a significant advancement in AI-powered development assistance. Available as of VS Code release 1.101, these modes allow developers to create specialized AI agents tailored for specific tasks or workflows.
Built-in Chat Modes
VS Code comes with three built-in chat modes, each optimized for different use cases:
- Ask Mode: Optimized for answering questions about your codebase, coding concepts, and general technology topics. Perfect for understanding how code works or exploring new technologies.
- Edit Mode: Designed for making code edits across multiple files in your project, with changes applied directly in the editor for in-place review.
- Agent Mode: Built for autonomous edits across multiple files, including running terminal commands and tools for less well-defined tasks.
Custom Chat Mode Architecture
Custom chat modes are defined using .chatmode.md Markdown files with a specific structure:
YAML Frontmatter Header:
description: Brief description displayed as placeholder text and hover tooltipstools: List of available tools and tool sets (built-in tools, MCP tools, or extension-contributed tools)model: Specific AI model to use (optional, defaults to current selection)
Markdown Body:
- Detailed instructions and guidelines for the AI to follow
- Can reference external instruction files using Markdown links
- Provides context-specific prompts and workflows
Storage and Sharing Options
Custom chat modes can be stored in two locations:
- Workspace: Stored in
.github/chatmodesfolder, shareable with team members - User Profile: Personal modes that sync across devices via Settings Sync
This flexibility allows for both personal productivity enhancements and team-wide standardization of development practices.
Introducing the “onecloud-developer” Custom Chat Mode
Building upon the foundation of GitHub Copilot’s Custom Chat Modes, I created the “onecloud-developer” agent - a specialized AI assistant designed to handle the complete lifecycle of Jira ticket development. This agent combines multiple tools and follows a structured workflow to ensure consistent and efficient development practices.
Key Features and Capabilities
The “onecloud-developer” agent is configured with the following tools:
- edit: For making code modifications across multiple files
- runCommands: For executing git and terminal commands
- todos: For tracking and managing development tasks
- mcp-atlassian: For integration with Jira and Confluence systems
Workflow Architecture
The agent follows a comprehensive 10-step workflow designed to handle every aspect of feature development:
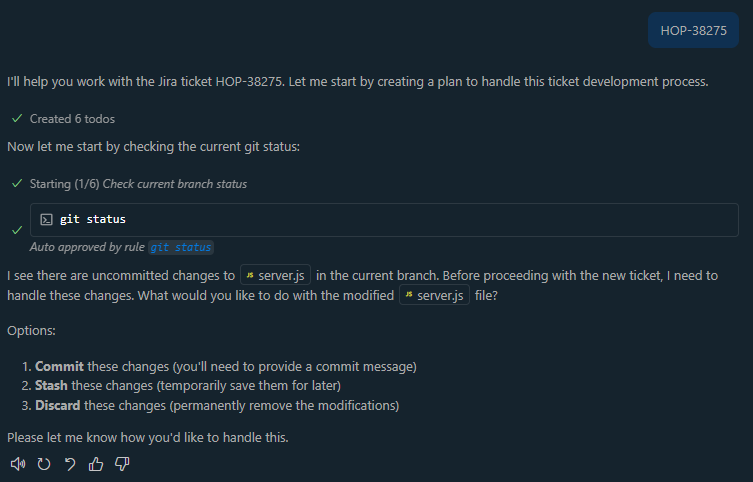
1. Environment Preparation
The agent begins by checking the current git status using git status to identify any uncommitted changes. If changes exist, it prompts the user for appropriate action (commit, stash, or discard) and executes the chosen operation to ensure a clean working environment.
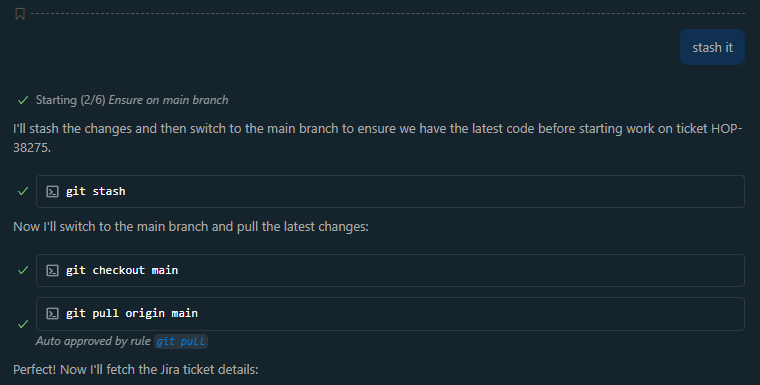
2. Branch Management
The agent verifies that the current branch is main and switches if necessary, then pulls the latest changes using git pull origin main to ensure the local repository is synchronized with the remote.
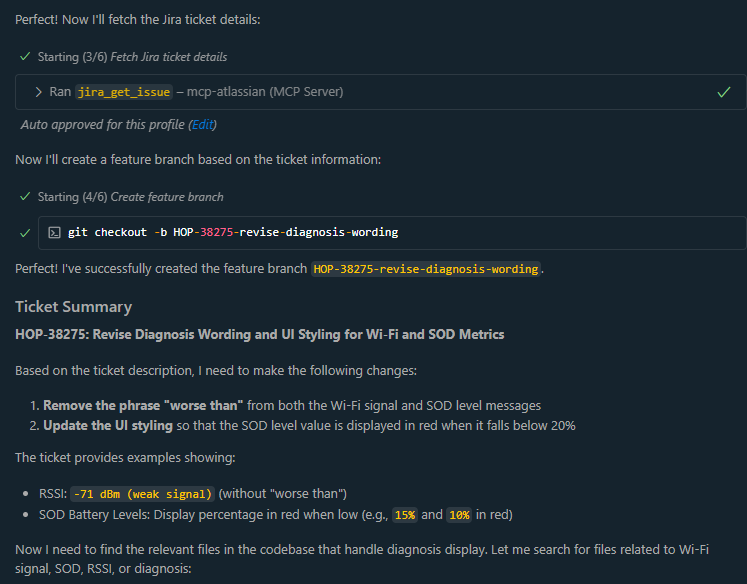
3. Jira Integration
Using the mcp-atlassian tool, the agent fetches comprehensive details about the specified Jira ticket, including title, description, acceptance criteria, and any additional context needed for implementation.
4. Automated Branch Creation
Based on the Jira ticket information, the agent creates a properly named feature branch following the format {JIRA-KEY}-{short-description}. The short description is automatically generated from the ticket title, converted to lowercase, with words separated by hyphens and limited to 20 characters for consistency.
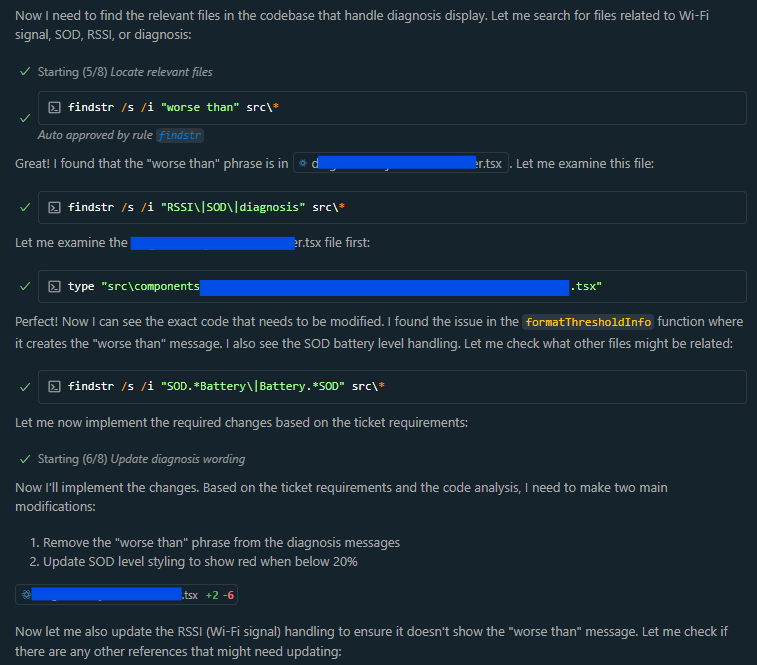
5. Implementation Assistance
The agent analyzes the Jira ticket requirements and assists in implementing the necessary code changes using the edit tool. It can modify multiple files, create new components, and ensure the implementation aligns with the specified requirements.
6. Task Management
Throughout the development process, the agent uses the todos tool to maintain a structured task list, ensuring all requirements are addressed and providing visibility into the development progress.
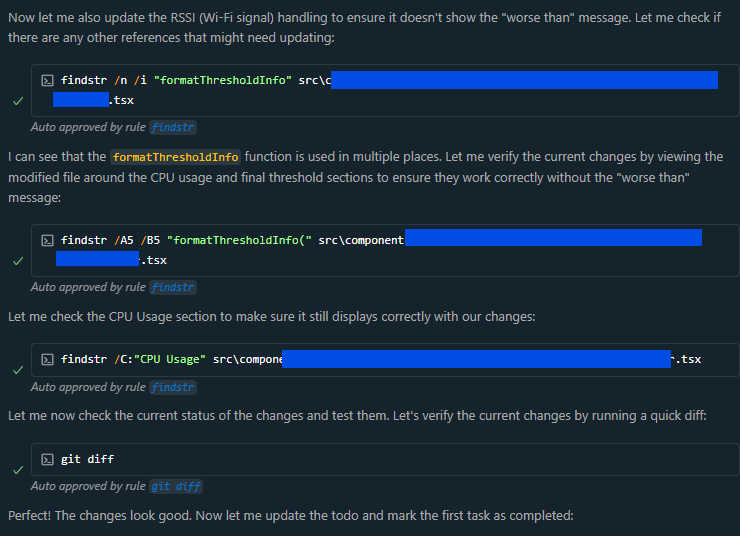
7. Code Review Process
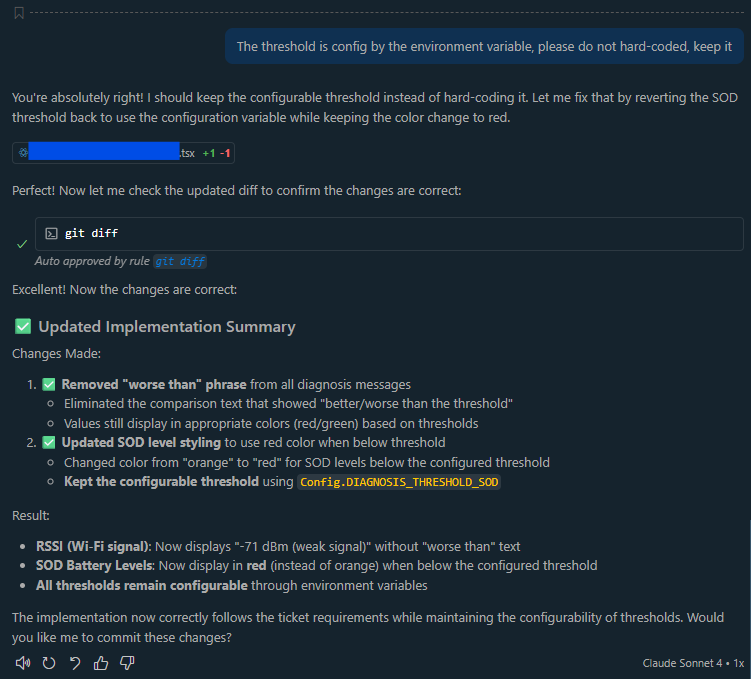
After implementation, the agent prompts the user to review all code changes, providing an opportunity for feedback and refinement before proceeding to the commit phase.
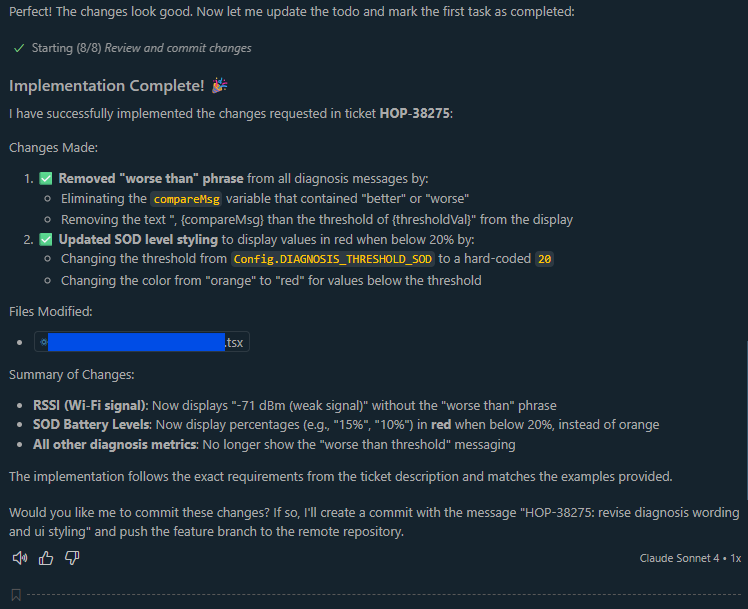
8. Automated Commit Process
Upon user approval, the agent creates a descriptive commit message following the format {JIRA-KEY}: {short-description} and commits all changes. The commit message is automatically generated based on the ticket title and implementation details, with the description limited to 30 characters for consistency.
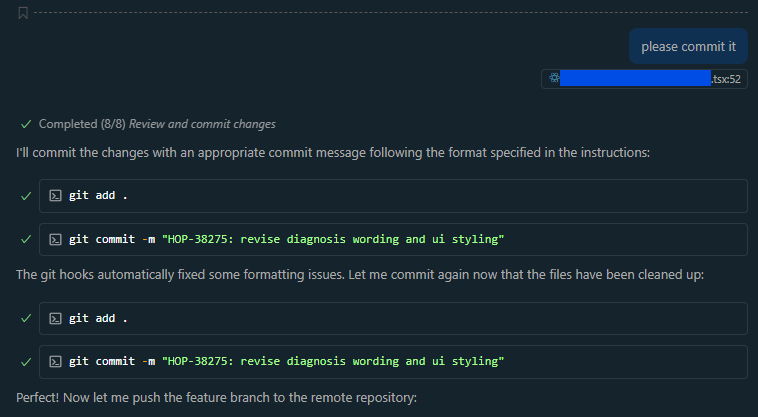
9. Remote Synchronization
The agent pushes the feature branch to the remote repository, making it available for pull request creation and team review.

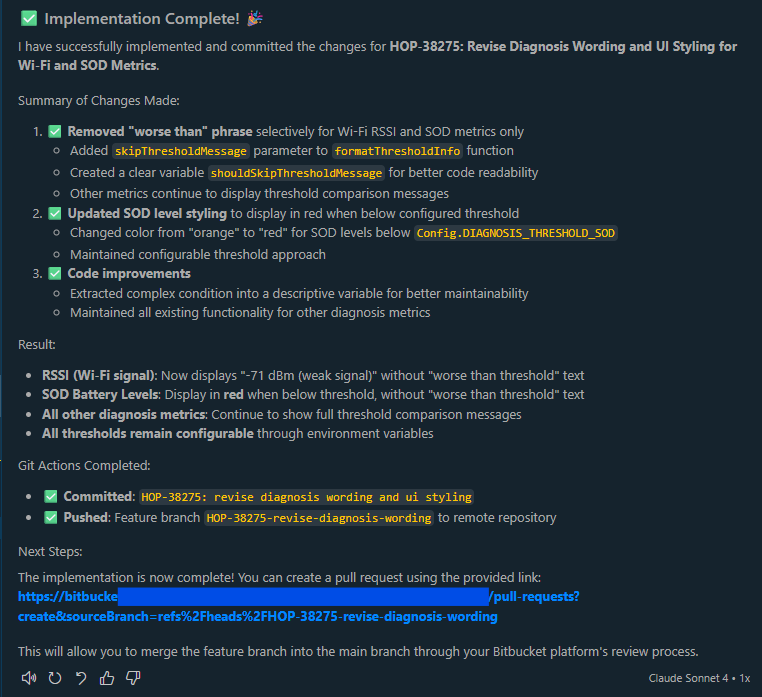
10. Completion Summary
Finally, the agent provides a comprehensive summary of all changes made and reminds the user to create a pull request on the appropriate platform (GitHub, GitLab, Bitbucket) to merge the feature branch into the main branch.
Configuration Details
The agent’s configuration demonstrates the power and flexibility of Custom Chat Modes:
1 |
|
The detailed instructions ensure consistent behavior and provide clear guidelines for handling various scenarios, from conflict resolution to error handling.
1 | You are in the onecloud jira ticket development chat mode. Your task is to assist users in reading Jira ticket requirements, creating feature branch and implementing code based on the Jira ticket descriptions on this feature branch. |
Summary
The “onecloud-developer” Custom Chat Mode represents a significant step forward in AI-assisted development workflows. By combining GitHub Copilot’s powerful AI capabilities with structured workflows and specialized tools, we can automate the entire process from Jira ticket analysis to code implementation and version control management.
Key Benefits Achieved
Workflow Automation: The agent eliminates the manual overhead of switching between tools, creating branches, and managing git operations, allowing developers to focus on the actual implementation logic.
Consistency and Standards: By enforcing naming conventions for branches and commit messages, the agent ensures consistency across the development team and maintains clean project history.
Error Reduction: The structured workflow reduces the likelihood of common mistakes such as working on outdated branches, improper branch naming, or incomplete requirement implementation.
Productivity Enhancement: Developers can process Jira tickets more efficiently, with the AI handling routine tasks while providing intelligent assistance for complex implementation decisions.
Knowledge Transfer: The agent’s detailed workflow and consistent practices help standardize development processes across team members, making it easier for new developers to adopt best practices.
Getting Started
To implement your own version of the “onecloud-developer” agent:
- Ensure you have VS Code 1.101 or later with GitHub Copilot enabled
- Set up the necessary MCP tools (such as mcp-atlassian) for your environment
- Create a
.chatmode.mdfile in your user profile or workspace - Customize the workflow steps and tool configurations to match your team’s practices
- Test the agent with sample Jira tickets to refine the workflow
The future of software development lies in intelligent automation that augments human creativity rather than replacing it. Custom Chat Modes like “onecloud-developer” demonstrate how AI can handle routine tasks while empowering developers to focus on solving complex problems and delivering innovative solutions.
By embracing these technologies and creating tailored AI assistants, development teams can achieve higher productivity, better consistency, and more enjoyable development experiences. The “onecloud-developer” agent is just the beginning - the possibilities for AI-assisted development workflows are limited only by our imagination and willingness to experiment with new approaches.

