Recently, I have been exploring various data integration tools to streamline our data workflows. One tool that has caught my attention is Airbyte. It supports a wide range of data sources and destinations, making it a versatile choice for data engineers and analysts alike.
Key Features of Airbyte
- Open Source: Airbyte is open-source, allowing users to customize and extend its functionality according to their needs.
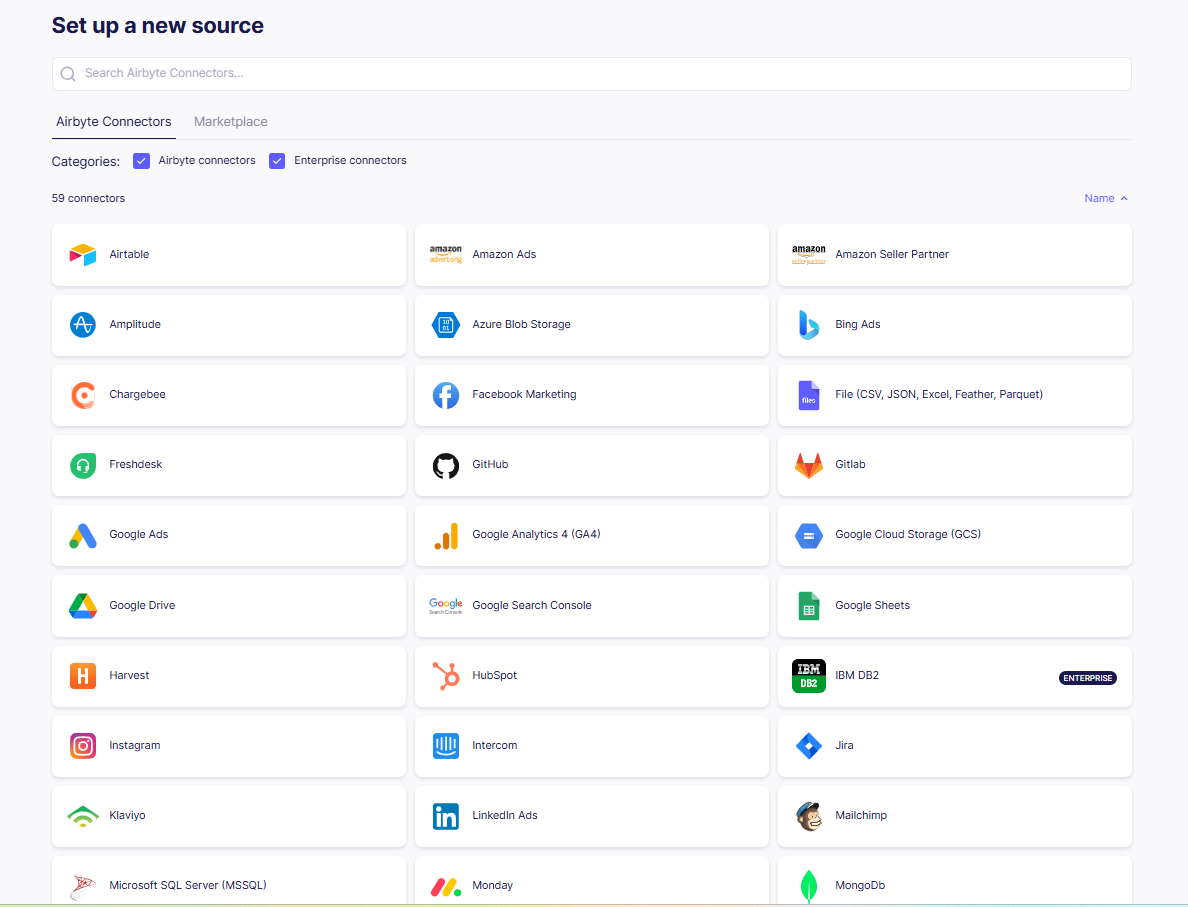
- Wide Range of Connectors: It supports over 600 sources and destinations, including databases, APIs, and file systems.
- Platform: Airbyte can be deployed on-premises or in the cloud, providing flexibility in how you manage your data infrastructure.
- Incremental Data Sync: It supports incremental data synchronization, reducing the load on source systems and improving efficiency.
- Custom Connectors: Users can create custom connectors using Airbyte’s connector development kit (CDK).
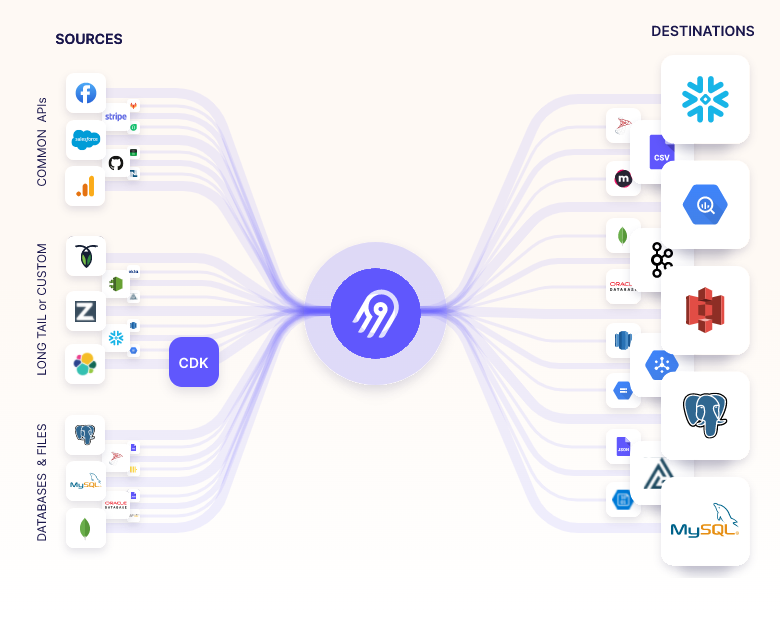
Airbyte Sources and Destinations
In Airbyte open source version, You can see it supports various sources and destinations.
Sources
- Databases: MySQL, PostgreSQL, MongoDB, Oracle, SQL Server, etc.
- APIs: Salesforce, Stripe, HubSpot, Google Analytics, etc.
- File Systems: S3, Google Cloud Storage, FTP, etc.
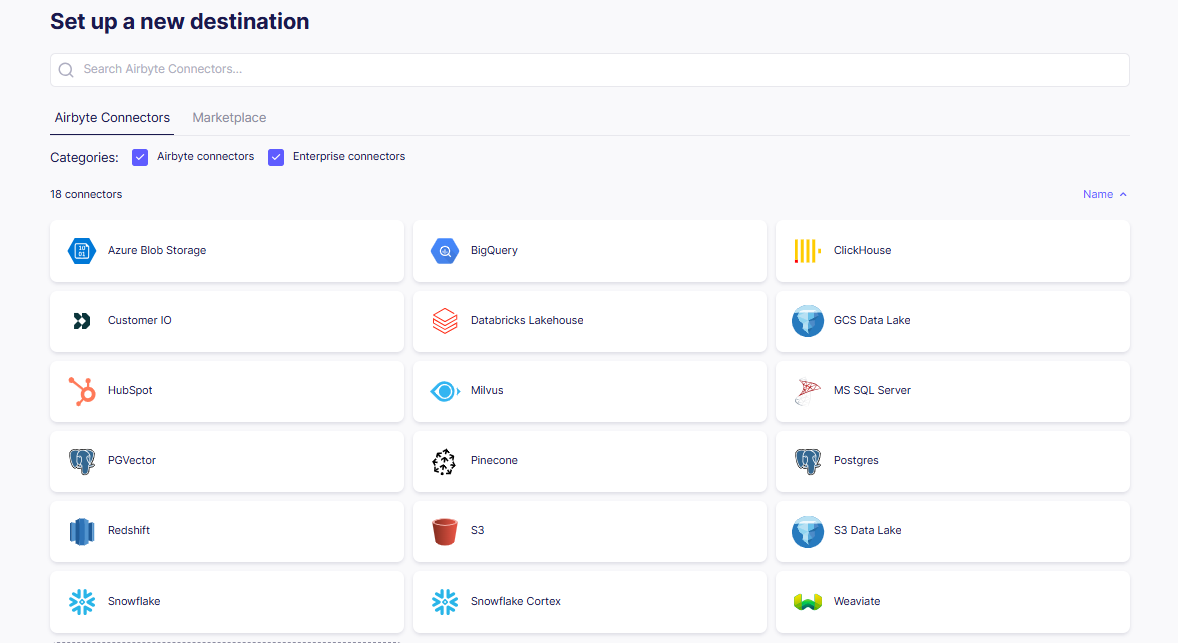
Destinations
- Data Warehouses: Snowflake, BigQuery, Redshift, etc.
- Databases: PostgreSQL, MS SQL Server, etc.
- Data Lakes: S3, GCS Data Lake, Azure Blob Storage etc.
Setting Up Airbyte Locally
You can choose Cloud deployment or Local deployment. Here, I will guide you through the local setup using Docker.
Install Docker: Make sure you have Docker installed on your machine. You can download it from here.
Install abctl:
abctlis Airbyte’s command-line tool for deploying and managing Airbyte.1
curl -LsfS https://get.airbyte.com | bash -
When installation completes, you see
abctl install succeeded.Run Airbyte:
To make Airbyte accessible outside localhost, specify the –host flag and provide a fully qualified domain name for Airbyte’s host.1
abctl local install --host example.com
If you’re running on an insecure/non-HTTPS connection, turn off the secure cookies requirement.
1
abctl local install --host example.com --insecure-cookies
For the detailed instructions, refer to the official documentation.
Once you’ve installed, you can see the airbyte docker containers is running:

Accessing the airbyte web app at http://<your-domain>:8000, you can start configuring your data sources and destinations. port 8000 is default port, but you can specify a different port using the --port flag during installation.
When first access it, you need to get the default password for login by running:
1 | abctl local credentials |
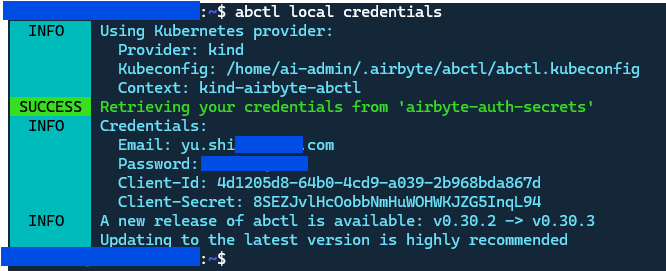
To set the own password, you can change it anytime through below command:
1 | abctl local credentials --password YourStrongPasswordExample |
Start Data Integration
Once logged in, you can start creating connections between your data sources and destinations. The Airbyte interface is intuitive, allowing you to configure sync settings, schedule data transfers.
For our project, we’re syncing the sentry data from Sentry (source) to Google BigQuery (destination). Since the Sentry only remains 90 days of data retention, we want to back up the data to BigQuery for long-term storage and analysis.
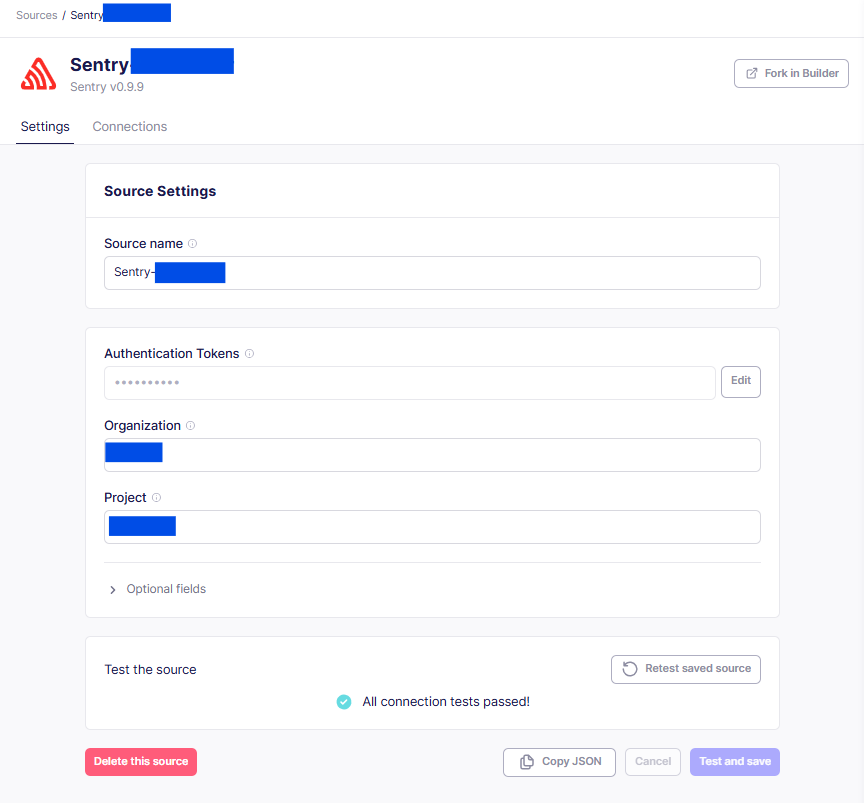
Setup Sentry as Source
In the source configuration, select Sentry from the list of available sources. You’ll need to provide your Sentry API token and organization details to connect. Once configured, make sure the the source connection is working by testing the connection.
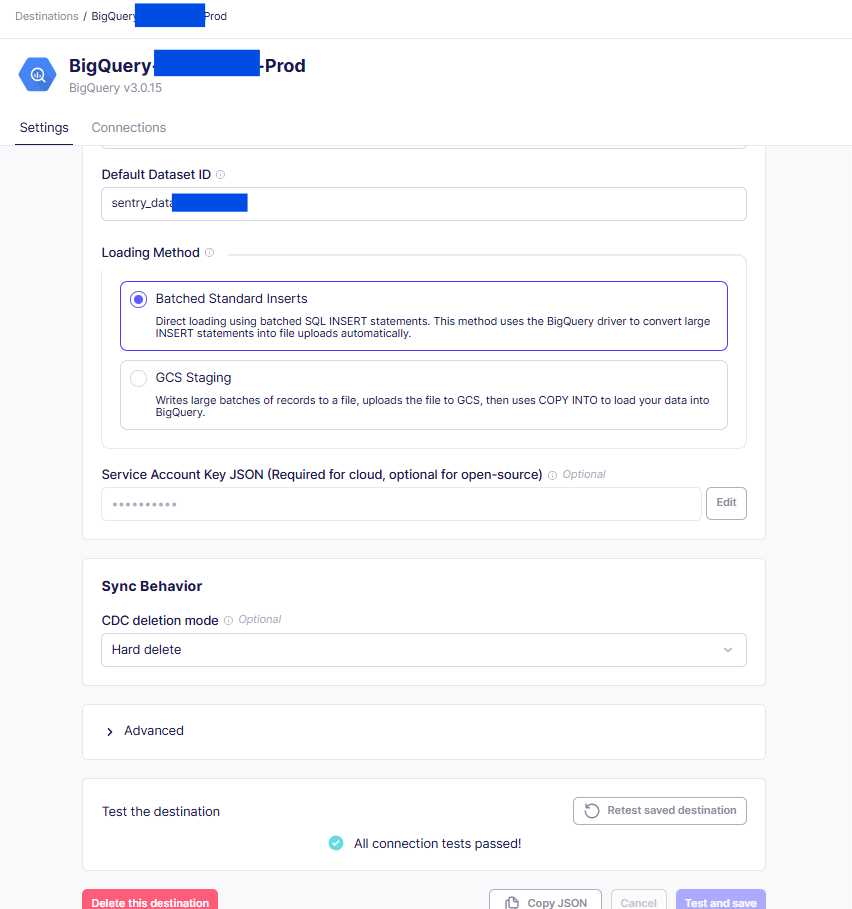
Setup BigQuery as Destination
Next, select Google BigQuery as your destination. You’ll need to provide your GCP credentials and specify the dataset where you want to store the data. Test the connection to ensure everything is set up correctly.
Setup Connection
Finally, create a connection between the Sentry source and BigQuery destination. You can configure the sync frequency, data transformation options, and other settings as needed.
For the initial sync, you might want to do a full refresh to back up all existing data. After that, you can set up incremental syncs to keep your BigQuery dataset updated with new Sentry data.
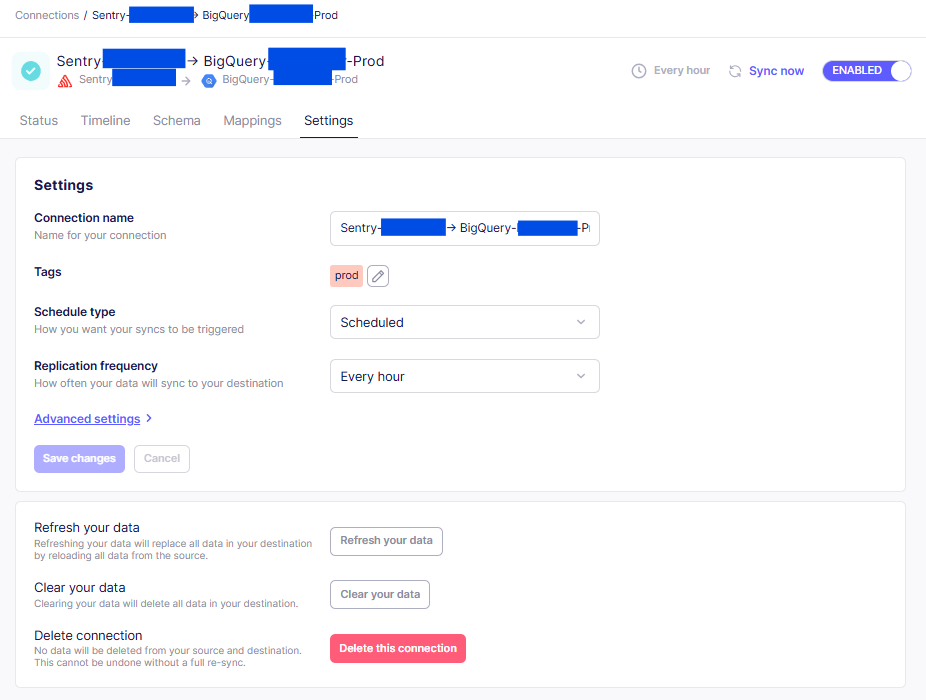
Below is an example of the scheduling sync to run every hour:
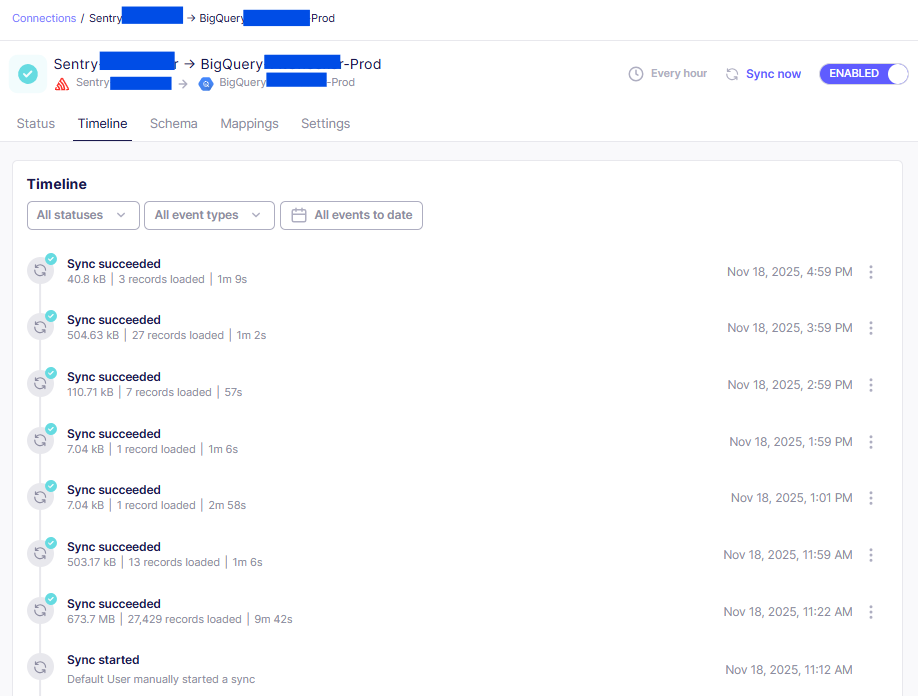
Check the Sync Data
Once the connection is set up, you can monitor the sync process from the Airbyte dashboard. It provides detailed logs and metrics to help you track the status of your data transfers. You can also check your BigQuery dataset to verify that the data from Sentry is being populated correctly.
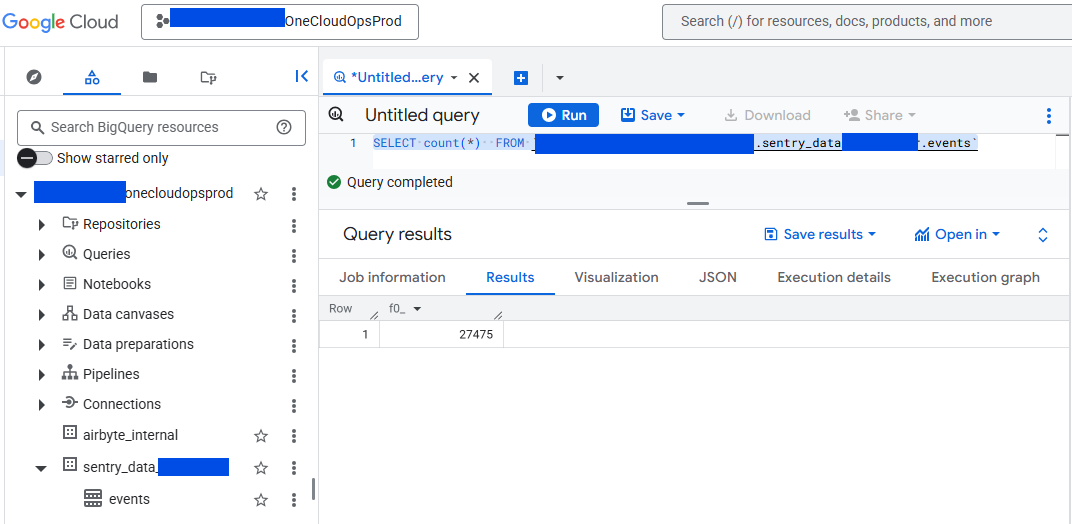
Below screenshot shows how many data count synced in BigQuery after the Airbyte sync job completed successfully.
Summary
Airbyte is a powerful and flexible data integration tool that simplifies the process of connecting various data sources to your data warehouses and lakes. Its open-source nature, wide range of connectors, and user-friendly interface make it an excellent choice for data engineers and analysts looking to streamline their data workflows. Whether you’re backing up Sentry data to BigQuery or integrating other data sources, Airbyte provides a robust solution for your data integration needs.
Hope you find this tool useful for your data integration tasks!

